Creating a Shift #
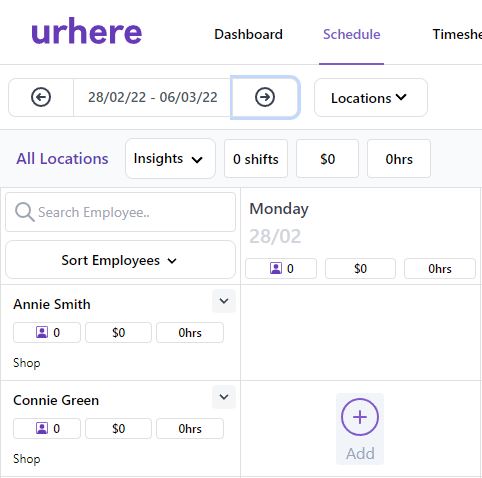
To create a Shift hover over any day, next to the respective employee. The Add button will appear. Click to add a shift.
Shift Management #
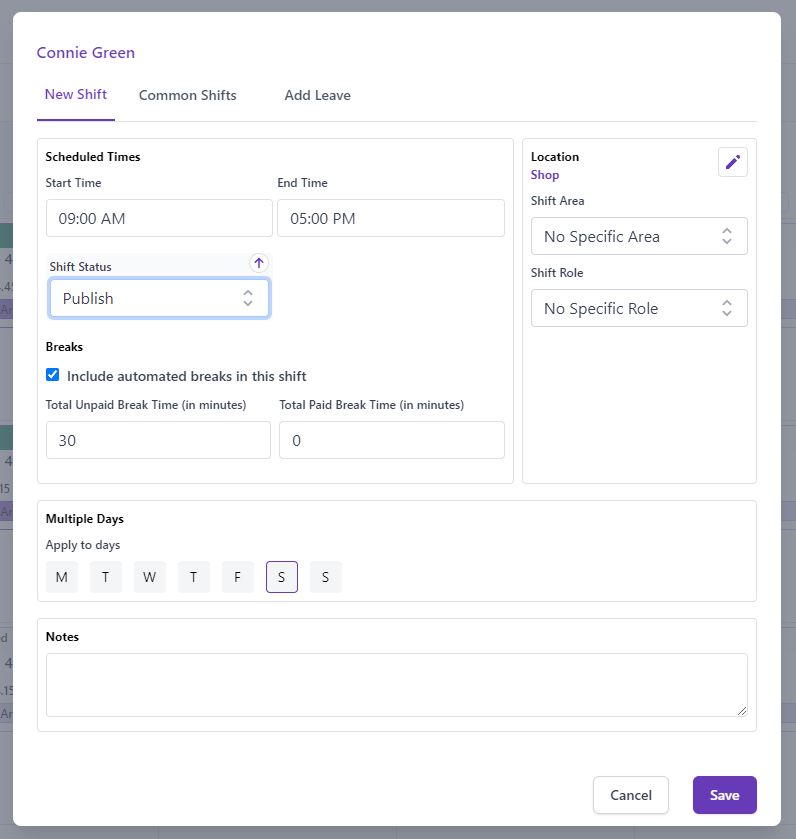
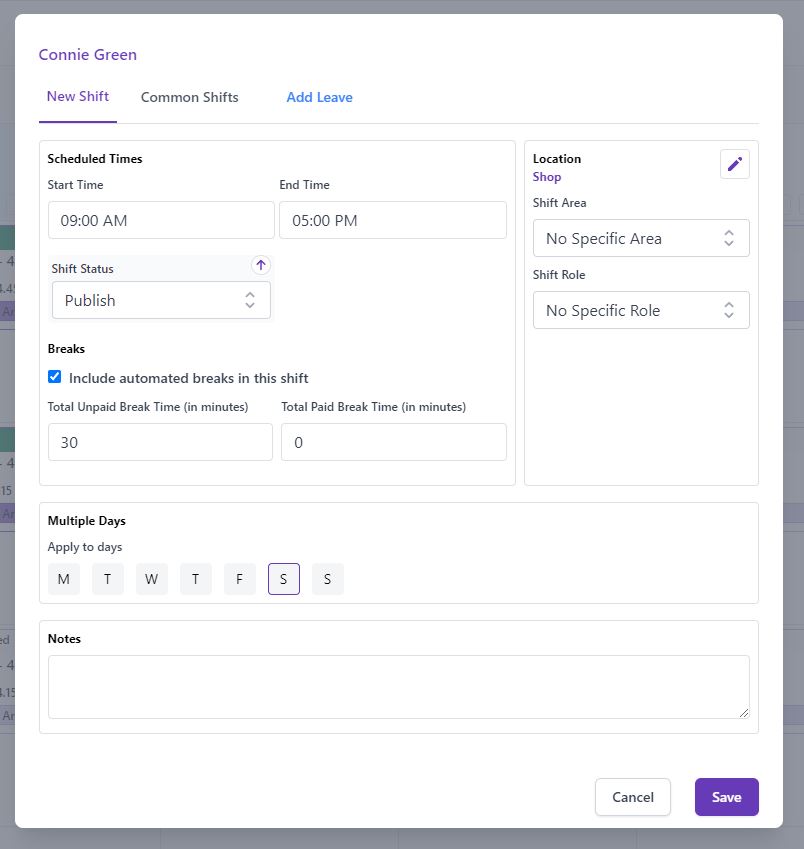
The Shift Management pop up allows you to define the level of Shift Detail that suits your business. Firstly, set the start and end times for the shift.
Shift Status #
The Shift status allows you to control when a shift is a draft, ready to publish. Once a shift is published that status provides an update from confirmed through to finished (complete).
| Status | Meaning |
| Not Published | Draft status. Shift only visibile to the manager |
| Publish | Ready to send to the employee |
| Confirmed | Accepted by the employee |
| Rejected | Rejected by the employee. Requires reallocation to another employee |
| Checked-in | The employee has checked-in. A start time has been recorded |
| Finsished | Completed Shift, both a start and end time has been recorded |
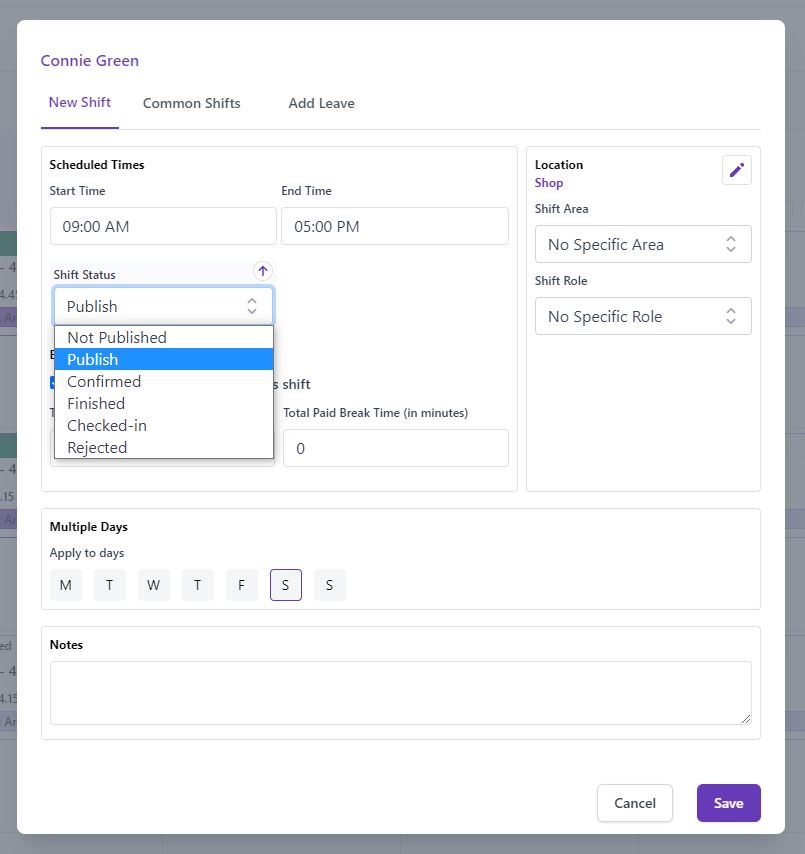
The default status is ‘publish’. Note: a Shift is NOT visible to the employee until the Roster is published.
Shift Location, Area & Role #
The Shift Location will default to the nominated location for the employee. You can edit the Shift Location, using the pencil icon (if you have multiple locations).
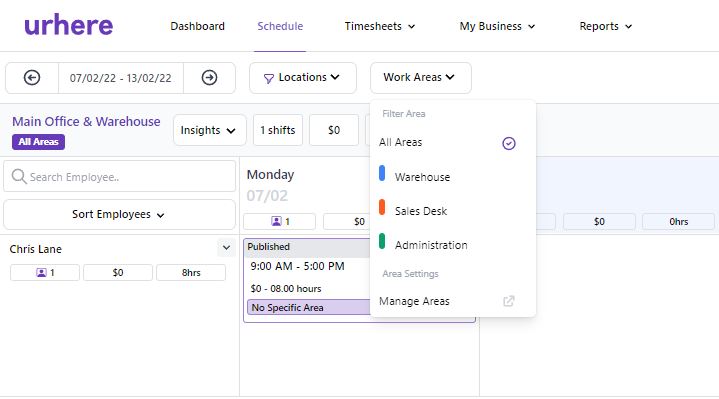
You can also nominate the employees Shift to a specific Work Area and Role. This categorisation ensures you can schedule with a view of having the right staff in the right areas for your operation.
Customising Work Areas & Roles #
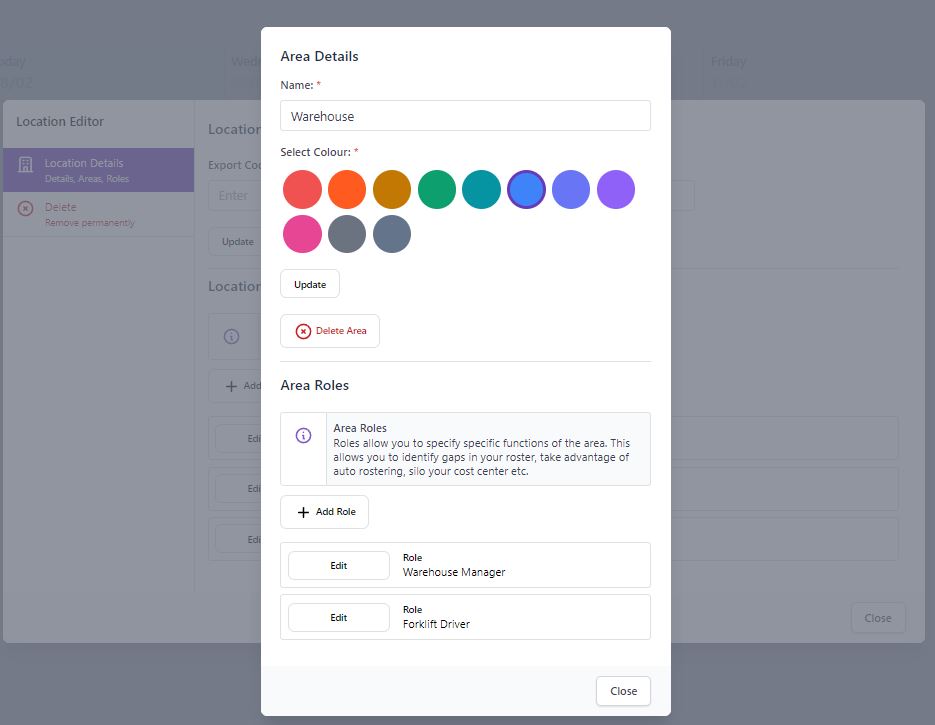
The Work Areas and Roles are customisable. Allowing you to create any name and nominated colour to differentiate across the Schedule. Work Areas and Roles sit within a Location. Each Employee will have their default Work Area & Role (if defined). You can appoint another Work Area or Role within any Shift, as required.
Shift Breaks #
If applicable to your staff, you can define the length of breaks and select break type between paid or unpaid. Any unpaid break time will be taken off the final total work hours for every Shifts Timesheet.
Shift Notes #
There is space to add any applicable notes to the Shift, if required
Update the Shift #
To save all Shift detail select “update”. The Shift is now on the Schedule. Shift Management of any Shift can be accessed at any time by clicking on the Shift.
Deleting a Shift #
To delete any Shift, click on the Shift and the Delete button is the bottom left of the Shift Management popup.


