Our onboarding feature allows you to add your employees’ info and get their info too. It makes starting with new hires easier and keeps all the documents and employee data in one place.
You can also share and request things like driver’s licenses, RSAs, employment contracts, bank details and more.
And the best part? It’s all included in your subscription without extra costs!
Getting Started #
To start the onboarding process, click either at the top of your schedule Add Employees > Onboard Employee Button or on the Employees page the Onboard Employee Button

Step 1 – Basic Details #
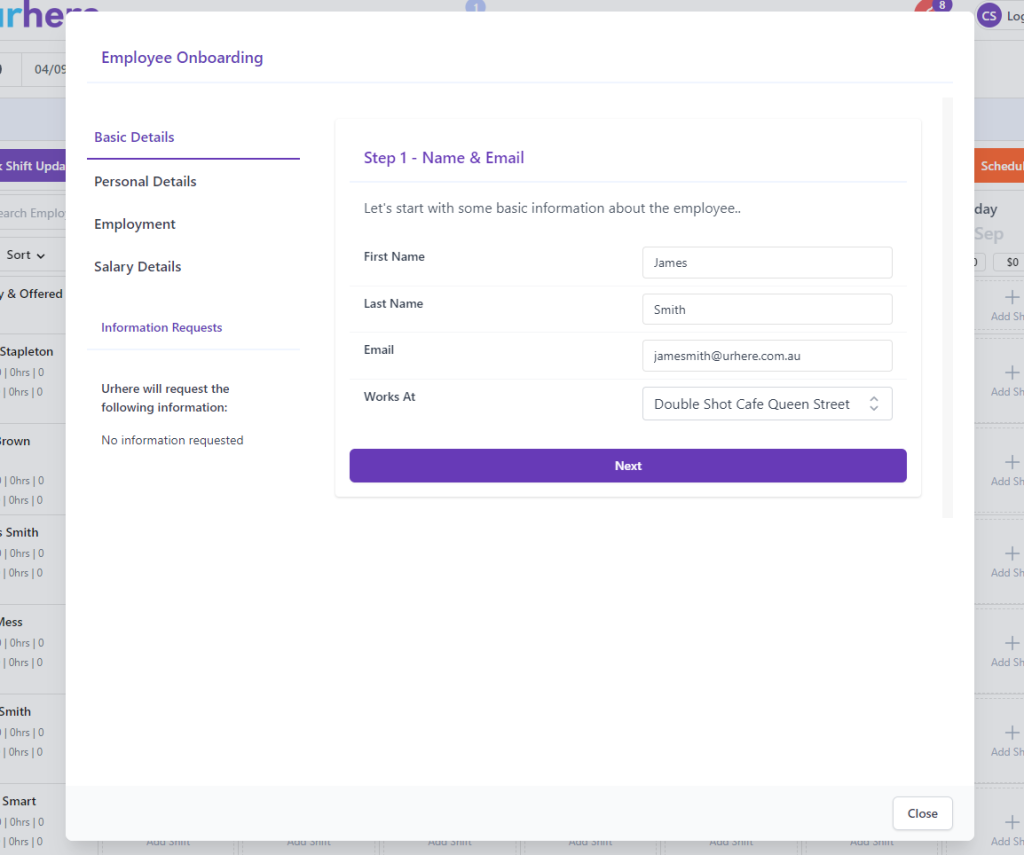
When you start the onboarding process, you’re presented with a screen with some basic details about the employee.
Unlike the quick add process where you don’t need to set an email address or last name, the onboarding process requires you to fill both of these fields in.
All fields on this screen are required.

Step 2 – Requesting or Inputting Details #
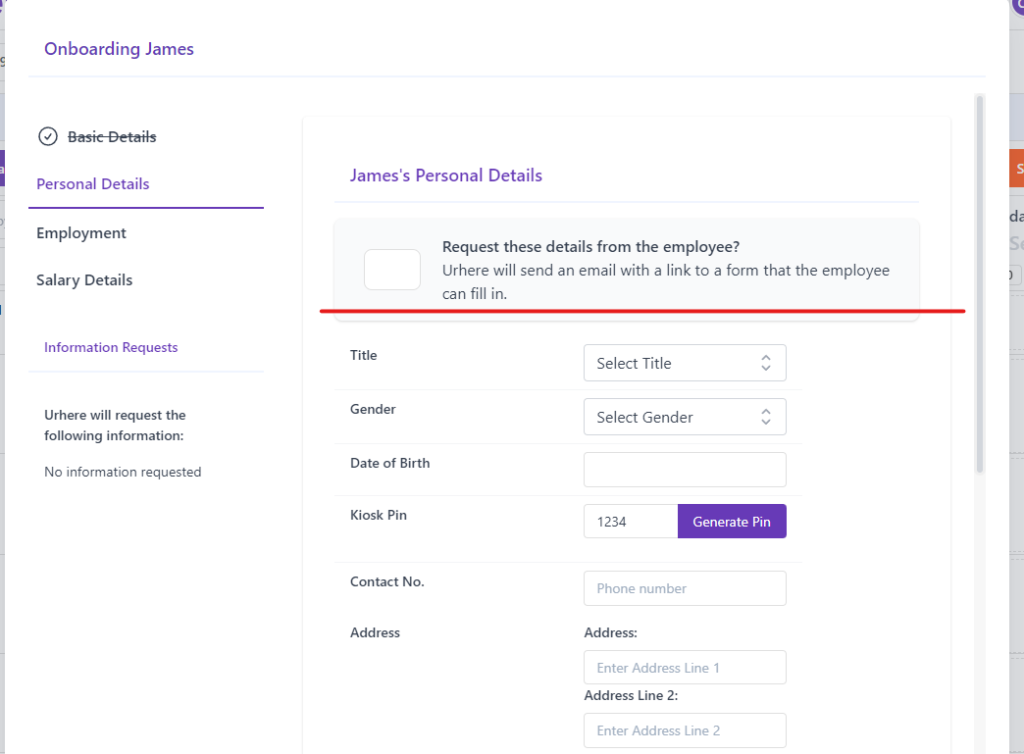
In the next screen, you are presented with fields that require a little more detail about the employee. As such, you have the option to request this information from the employee.
How to request Personal Details from the Employee
If you require the employee to fill out details such as DOB, Address etc. Click the “Request these details from the employee” check box at the top of the section:

Once selected, the software will hide the fields.


Requesting Bank, TFN & Super Information from the Employee
To help with administration, you can request this information from the employee. To do this, click the “Request these details from the employee” checkbox in the corresponding section.

Step 3 – Supplying Documents to Your Employee #
You may need to supply documents such as an employment contract, policy forms, OH&S etc. to your employee.
To do this, click on the “Add Document” button under the Supply documents heading.

Simply select the type of document you’re supplying. If your document type does not appear in this list, choose the closest document. You can also add to this list by browsing to Settings > Employee Document Types.

Click the Upload button and then select the appropriate file.


Once finalise, click the Save button. You can add as many documents as you like. Do add more, click the “Add Another” button.

Scroll down to the bottom of the page and press “Save”.
Step 4 – Requesting Documents From Your Employee
You may require your employee to return the supplied documents or you may need them to upload their RSA, Driver’s license etc.
Requesting a document is a similar process to the document supply process.
To request a document, click the “Add Document Request” button:


You can request multiple documents, such as an employment contract and “RSA” for example. To do this, click on the “Add Another Request” button.

Step 5 – Employment Details #
This section cannot be sent to, and is not visible to the employee
If you know the employment details of the employee, you can fill in these details now.

You can edit these after this process by going to the employee’s profile.
Step 5 – Salary Details #
If you know the salary details of the employee, you can set them here.

Step 6 – Finalisation #
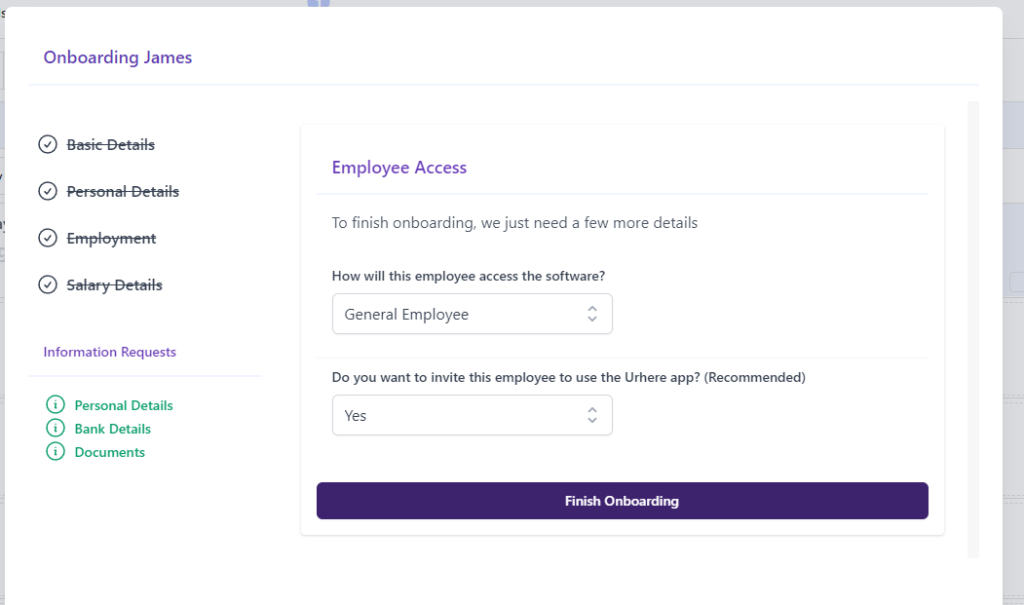
To finalise the onboarding process, only a few bits of information remain.
If the employee will have administrative access to the software, you can set that here.

If you decide not to invite the employee to use the Urhere app now, you can do this at anytime in their profile.
Once you have filled out the fields, you can finish the onboarding.

What the Employee Will See #
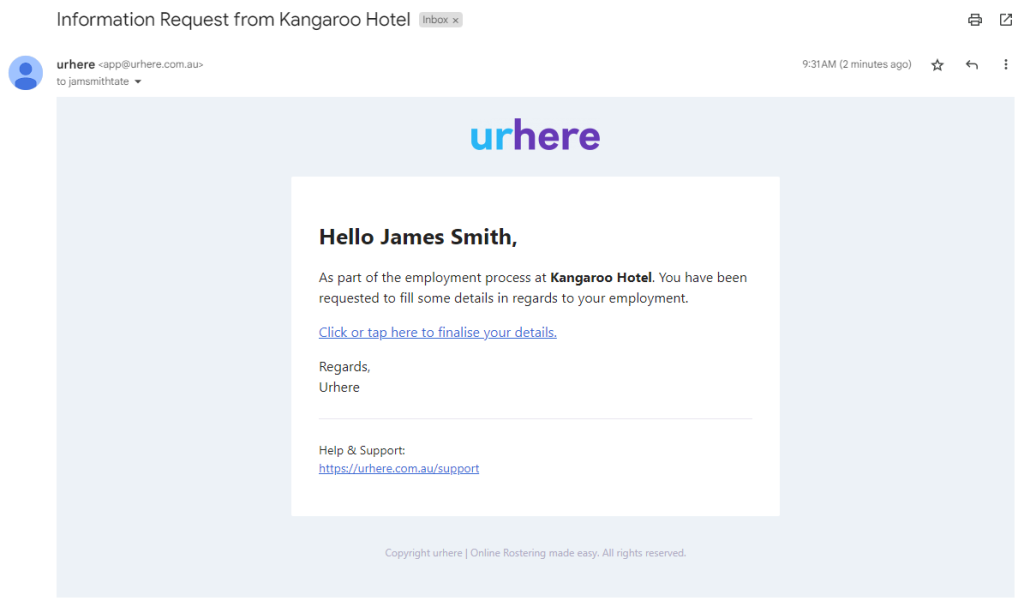
If you have requested information or documents from the employee, they will receive an email from Urhere with the subject “Information Request from Your Business Name”.

Form & Document Request
Depending on what you request from the employee, there will be all or one of three sections:
- Personal Details
- Bank Details
- Documents
Details Example:


