Urhere allows you to build your Online Schedule in minutes. Here are some tips and tricks to help you save more time.
Copy and paste a Shift #
Hover over any existing shift and select ‘Copy’.
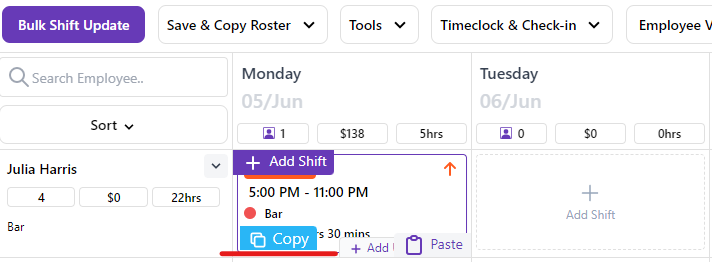
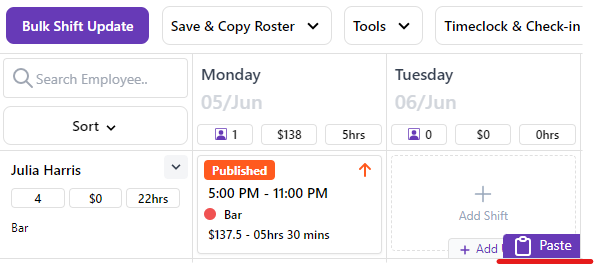
Hover anywhere on the schedule where you want to paste the shift and select ‘Paste’. You can paste the original shift in as many days and for as many employees as you want.
Copy and paste a Schedule (week) #
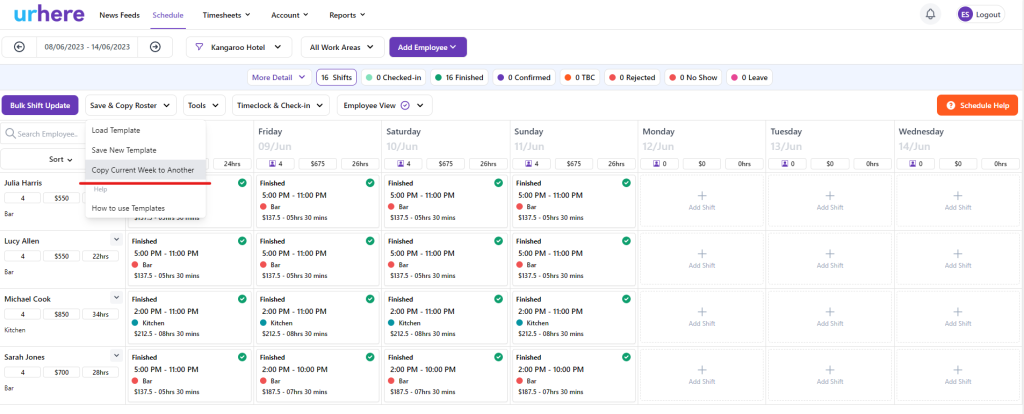
When you have a favourite roster you can copy and paste it into any other week. Simply navigate to your selected schedule week. Go to Save & Copy Roster and select “Copy Current Week to Another”.
Select any future week and click Paste Schedule.
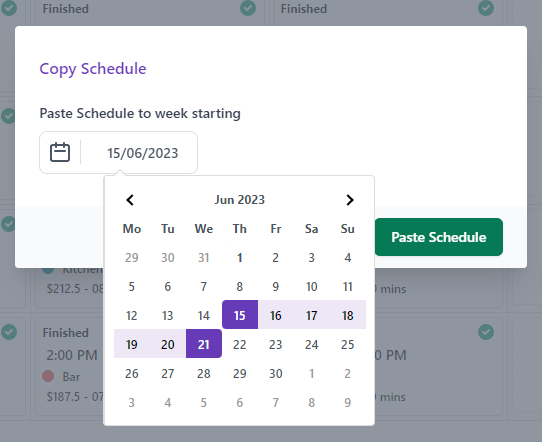
The copied roster instantly appears in the selected week as a Draft layout.
Bulk Shift Update Option #
When you are happy with the schedule you can Publish all shifts, making the roster visible to the employees on shift using the Bulk Shift Update button.
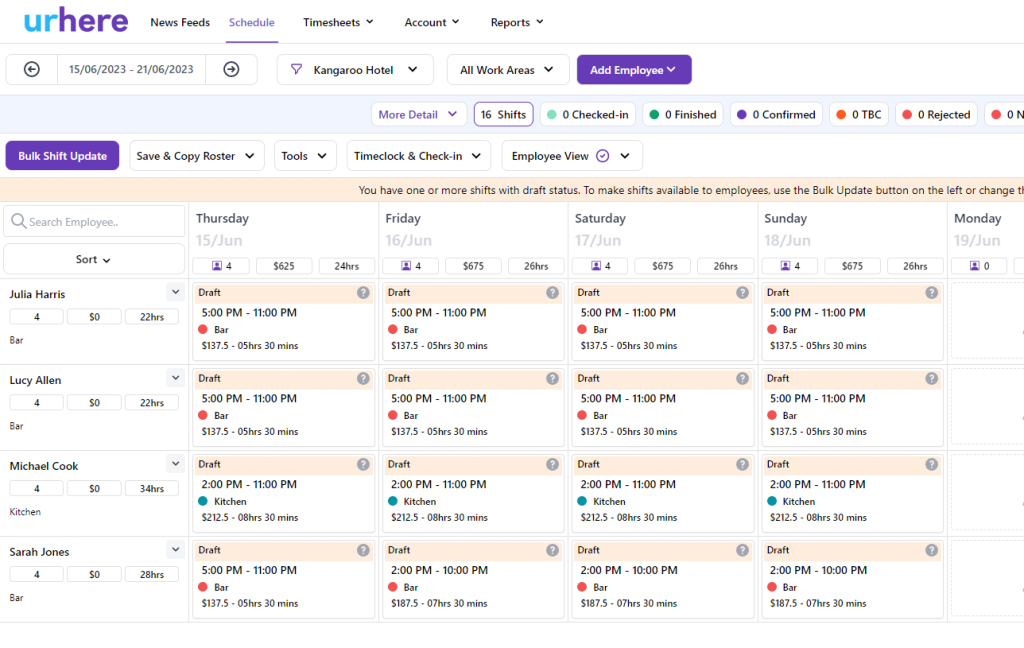
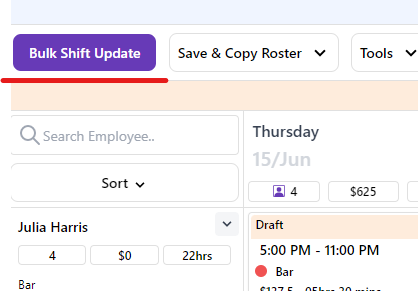
In this case, you can select “I want to Publish Shifts” .. “That have a status of Draft”. You can also choose if you want to notify employees of these changes.
Note: You can use any combination of bulk shift update, such as Unpublishing, Publishing, Confirming, Rejecting or Checking Out Shifts that have a status of Published, Confirmed, Draft, Finished, Rejected, Checked-In or All Statuses. You can also decide whether you want to notify your employees, or not.
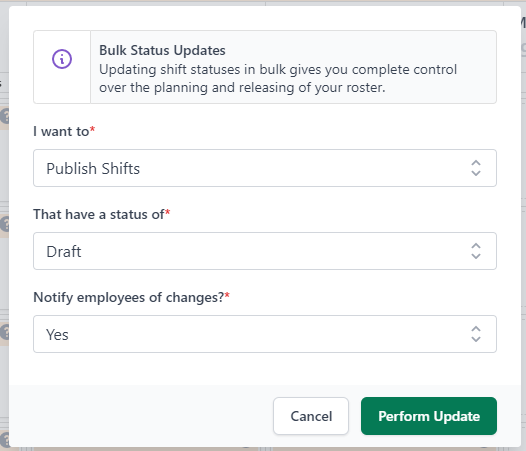
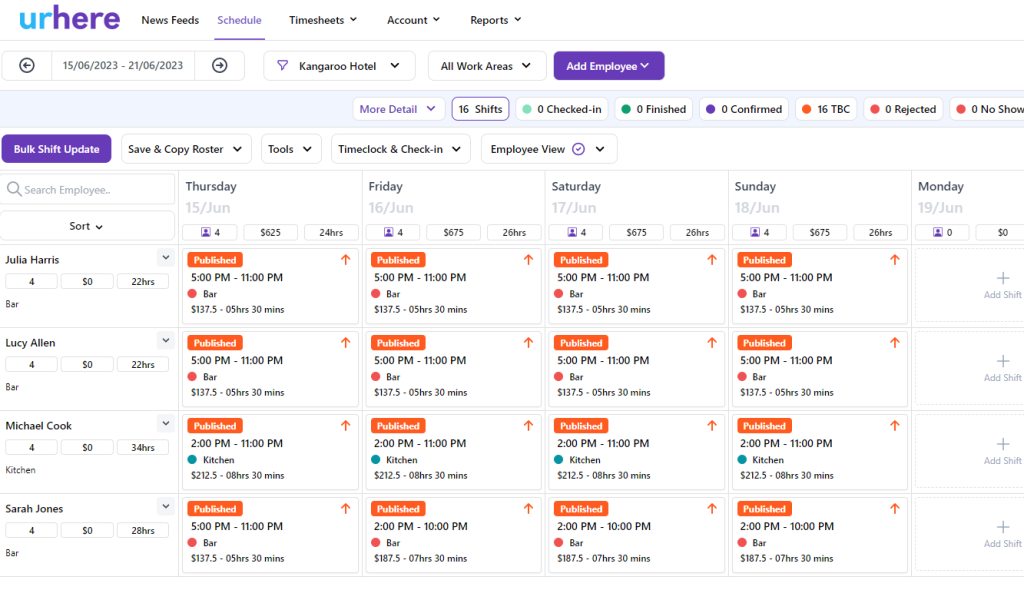
Click the “Perform Update” button and all the Draft shifts in your weekly schedule will change to Published shifts as seen below.
Instantly Clear the Schedule #
If you are unhappy with the roster at any time and want to remove shifts on the schedule. You can clear shifts by clicking the “Tools” bar and selecting “Clear Current Schedule”. You can remove All Shifts or filter for specific Shift Statuses you want to remove, such as only Rejected, only Published, only Draft or All Except Finished.
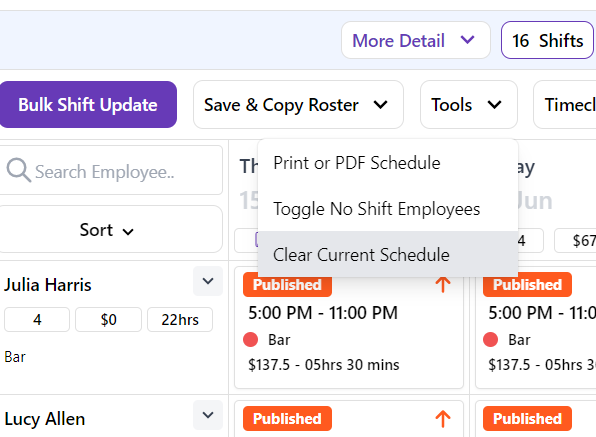
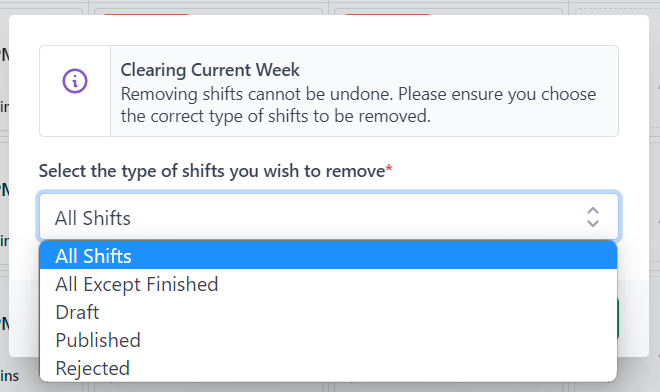
Then press “Clear Shifts” and the selected statuses of shifts from your schedule will be removed.
Note: Once a roster is cleared, it cannot be undone.
Saving the Roster as a Template #
When you have a favourite schedule you can also save it as a Template, allowing you to import it into any week. Save as many Templates as you want and import them into any week in an instant. To save the current schedule as a Template, go to “Save & Copy Roster” and select Save New Template.
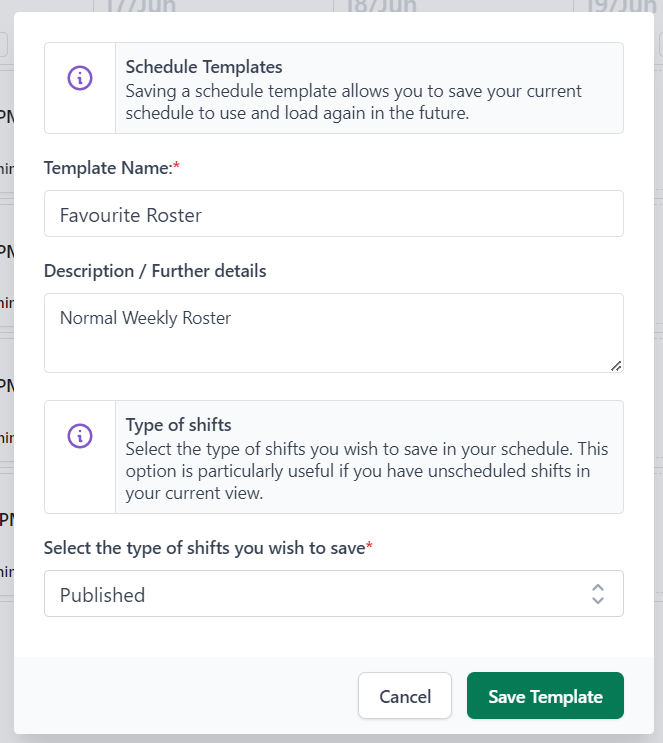
You will receive a Schedule Template Created notification.
Loading a Roster Template #
Go to any week on the Schedule and under Save & Copy Roster, select Load Template. Select the applicable Template and select Load Template.
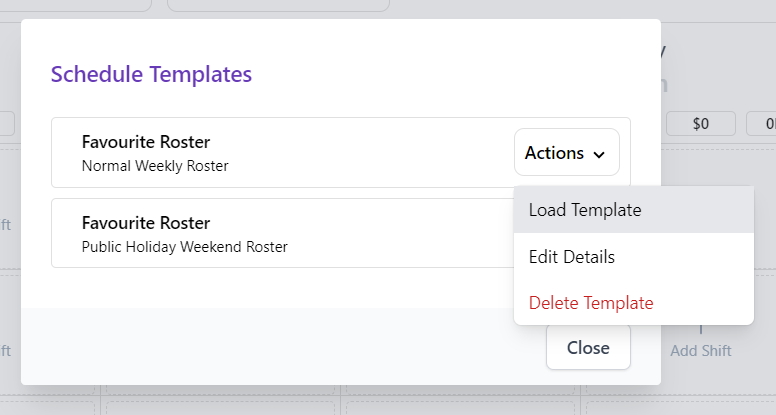
In an instant, the template is loaded into the week. When it is ready, simply Publish using the “Bulk Shift Update” button. Publishing the Shifts that have a status of Draft and either notifying employees of changes or not.
Note: You can use any combination of bulk shift update, such as Unpublishing, Publishing, Confirming, Rejecting or Checking Out Shifts that have a status of Published, Confirmed, Draft, Finished, Rejected, Checked-In or All Statuses. You can also decide whether you want to notify employees, or not.


